Is a foamcore insert worth building?
Foamcore is cheap, forgiving, and shaped to exactly one game — but it's a project, so build one only when you're fixing a specific annoyance. Loose pieces rattling in a half-empty box, an expansion that won't fit, sleeved cards that no longer drop into the stock tray, a setup that eats ten minutes every session: those are the problems it solves. If the insert that came in the box already works for you, there's no reason to build. Decide your goal first, because the goals conflict. Foam board is best at keeping a box neat and organized; if you only want to cram in expansions or shave setup time, cheap dollar-store containers or plain baggies are sometimes the more durable, lower-effort answer. Don't build one just because it looks impressive online.

Start small, and expect to redo it
Your first insert should be a simple game — a floor, four walls, a few dividers — not a heavily-componented monster. Builders who started on the big, fiddly titles almost all say it was too ambitious for a first attempt. Failing is nearly free: a sheet of foam board is cheap, so a botched cut wastes almost nothing, and you're still spending far less than a commercial insert once shipping is added. Treat the first piece as practice — experienced builders describe a big quality jump between the first insert and the second, because cutting foam board cleanly is a skill your hands learn. Set a curfew, too; this is the kind of project people look up from to find it's well past midnight.
The five-item shopping list
You can build a complete insert with five cheap things, plus a box of pins. Skip the specialty gadgets to start.
- Foam board, about 5mm thick (also sold as 3/16 inch). It's kraft paper over a foam core, sold at craft and office stores and cheaply at big-box retailers. Black looks more premium and hides small mistakes; white shows glue smears far less and is easier to find. Both work — pick what's on the shelf.
- A snap-off utility knife plus spare blades. The snap-off style is the beginner favorite because you get a fresh edge instantly and the stiff blade won't flex, giving cleaner, squarer cuts. A hobby knife with number 11 blades works for fine detail but dulls faster.
- A metal ruler, roughly 18 to 24 inches, and a small square. Never use a wooden straightedge — the blade shaves the edge and ruins your line. A cork-backed metal ruler grips better, and a square keeps your cuts perpendicular.
- A self-healing cutting mat. Cuts close back up and it lasts far longer than cardboard. Stacked scrap cardboard or a gridded sewing mat is a budget stand-in.
- PVA or white craft glue, the plain kind. The paper surface of foam board takes it perfectly, it's cheap, and it's forgiving. A tacky craft glue or a multi-purpose white glue is ideal.
Skip hot glue entirely — the community is emphatic that it's a bad idea, since it goes on stringy and lumpy and can melt or warp the foam. Super glue, model glue, and rubber cement are unnecessary too. Add a box of flathead pins as your clamps and you have everything you need.

Cutting technique: the part that actually matters
Nearly every 'what am I doing wrong' complaint traces back to the cut, and the cut is a technique, not a tool. Make three light passes instead of one forced stroke: the first scores through the top paper, the second cuts the foam, the third severs the bottom paper. Powering through in a single deep cut is the most common cause of jagged, torn, crumbly edges. Let the blade do the work with minimal downward pressure, and put your effort into holding the ruler steady and the blade tight against it. A sharp blade is everything — foam board dulls blades shockingly fast, so snap or replace it the moment edges start tearing. A dull blade is also the more dangerous one, because it skips and forces instead of slicing.
How to keep your walls from leaning
Angled walls come from cutting seated or across your body, and from the blade wandering off the ruler. Fix your posture first: stand up, get directly over the work, look straight down, and pull the cut toward you. Cut from the shoulder, not the wrist, and put big pieces on the floor. Then keep the straightedge planted — lean on it hard, back it with cork or removable putty, or pin the foam at both ends and run the ruler against the pins. Rake the blade toward the ruler at roughly 45 degrees rather than holding it bolt upright; it cuts more smoothly and can't stray outward. Even so, accept that you'll end up a millimeter or so off. Experienced builders still get slightly angled cuts and just design a little tolerance in rather than chase perfection.
Plan loosely, measure obsessively
The low-tech method almost everyone uses: dump the components into piles in the empty box, slot scrap foam board between the piles to feel out compartment sizes, and rearrange like Tetris until the layout works — then take exact measurements and build. Cut one base piece that fits the box first, and build the walls up from it. The single most-forgotten step is accounting for the roughly 5mm board thickness, because every wall eats 5mm of interior space. Measure component heights, especially decks and the rule book, to set wall heights and the clearance under the lid. Measure twice and cut once, checking each line at both ends so it's parallel. Dry-fit every piece before any glue touches it, and build in deliberate slack — a gift card's width of breathing room so the finished trays aren't jammed into the box.
Joints and gluing
Butt joints, where one wall's edge meets the face of the next, are perfectly fine for a beginner. Bevelled 45-degree joints look cleaner and hide cut imperfections in the glue line, but they're trickier and can wait until you've built a few. Pins are your clamps: their real value is holding a joint square while the glue dries, even when your cuts aren't perfect. Push them in at an angle and cross two into an X so the joint can't pull apart as it cures, and pin from a hidden edge so the holes don't show. Dry-fit the whole assembly before gluing, then glue in one direction across the box — don't trap a piece between two walls you've already glued, which is exactly what the intuitive 'build the outer shell first' order does. PVA dries faster than you expect, so work in sections and wipe any squeeze-out immediately before it discolors the board.
Designing for upright storage
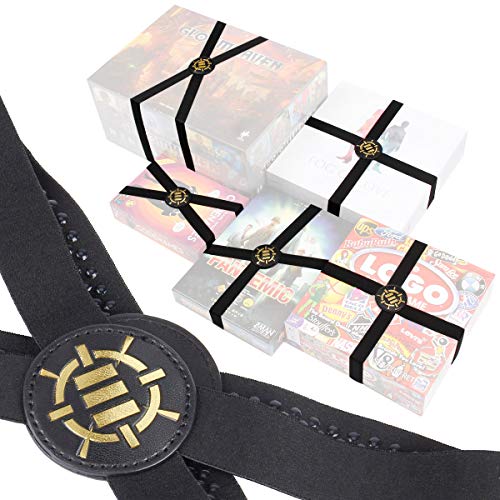
Most people shelve and carry their boxes on end, which is where a foamcore insert earns its keep — if you design for it. Fill all the air: make each compartment only as big as the component needs so cards can't tip and tokens can't slide, even if that leaves dead compartments that hold nothing but occupy space. Build everything flush to the top edge so the closed lid, plus the board and rule book laid on top, press down and seal the contents in place. Put the dense, heavy stuff — tile stacks, card decks — toward the bottom of the upright box so there's less mass up top trying to push the lid open. For a box the components don't fill to the brim, add a thin foam board cover sheet with a notch cut in one corner so you can lift it out. As a backstop, a set of box bands around the closed box keeps it from relaxing open when a neighboring game gets pulled off the shelf.
Protect your fingers and your components
The injuries here are real — builders report numb thumb-tips, stitches, and a blade that jumped the straightedge and took off a fingertip. Keep your fingers behind and off the edge of the ruler, and don't get so fixated on the straightedge that you lose track of where your other hand is. Remember that a dull blade is the more dangerous one, and that a freshly pinned tray will stab you if you grab it wrong. Guard the game pieces too. When you use components or spacers to position a piece, wrap them in plastic wrap or slip in a gift card as a glue barrier, then pull them out before the glue sets so nothing bonds to your cards. Never run the blade against an actual component — use it to set the ruler, remove it, then cut. And don't build pockets so tight that players bend cards getting them out, especially sleeved ones. Aim for tight enough that pieces don't shift, loose enough that you're not damaging them.
When not to build one
Foamcore isn't always the right call. If pure setup speed is all you want, baggies and cheap containers do the sorting for less effort and hold up better to being dumped out. If you want a premium, precise, no-effort fit, a commercial insert like a Folded Space kit is molded to the game and drops straight in. And 3D printing is the other DIY path — a printed tray is shaped to one exact game if you own or can borrow a printer. Foamcore's sweet spot is the middle: cheap, fully custom, satisfying to make, and available to anyone with a craft knife and an afternoon.